Respeaker 2-Mics Pi HAT——专为 AI 和语音应用设计的 Raspberry Pi 双麦克风扩展板
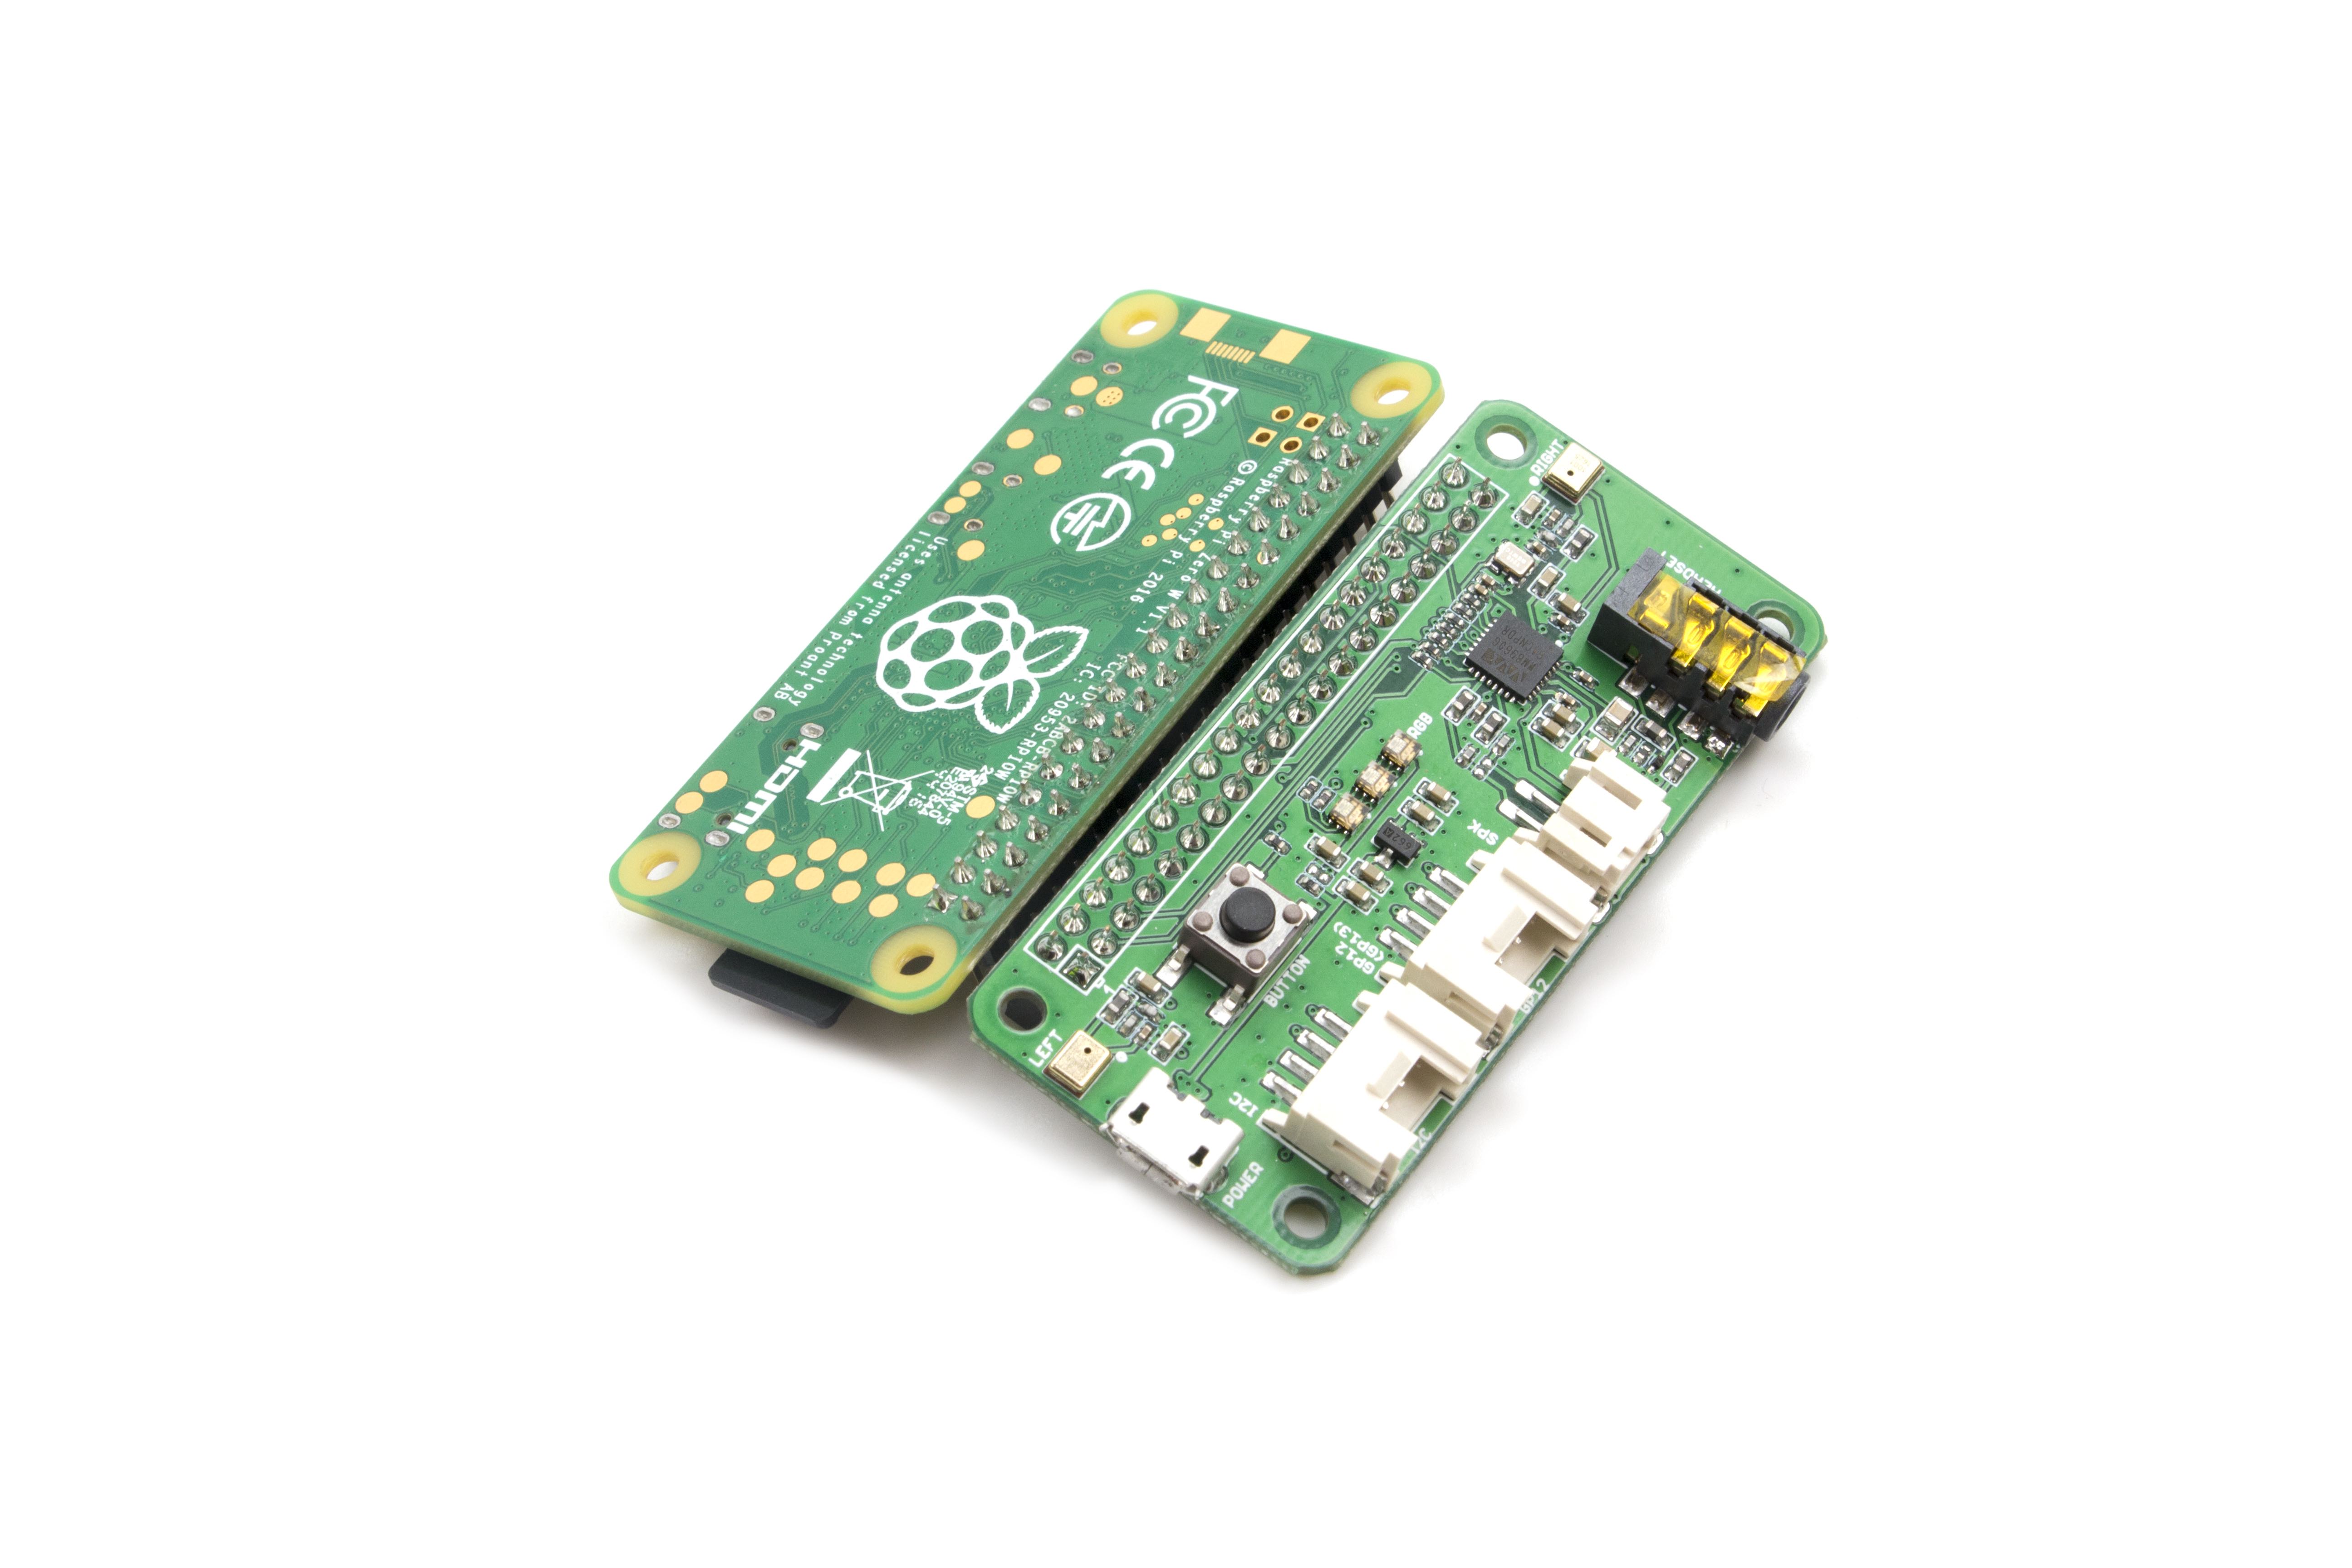
ReSpeaker 2-Mics Pi HAT 是专为 AI 和语音应用设计的 Raspberry Pi 双麦克风扩展板。 这意味着您可以构建一个集成 Amazon Amazona 语音服务,Google 助手等的功能更强大,更灵活的语音产品。
该板是基于 WM8960 开发的低功耗立体声编解码器。 电路板两侧有两个麦克风采集声音,还提供 3 个 APA102 RGB LED,1 个用户按钮和 2 个板载 Grove 接口,用于扩展应用程序。 此外,3.5mm 音频插孔或 JST 2.0 扬声器输出均可用于音频输出。
产品特征
- Raspberry Pi 兼容(支持 Raspberry Pi Zero 和 Zero W,Raspberry Pi B +,Raspberry Pi 2 B 和 Raspberry Pi 3 B)
- 2 个麦克风
- 2 个 Grove 接口
- 1 个自定义按钮
- 3.5mm 音频接口
- JST2.0 音频输出接口
创意应用
- 声音交互应用
- AI 助手
硬件概述

- 按钮:连接到 GPIO17 的用户自定义按钮
- MICL&MIC_R:左边右边各有一个麦克风
- RGB LED:3 个 APA102 RGB LED,连接到树莓派的 SPI 接口
- WM8960:低功耗立体声编解码器
- Raspberry Pi 40 针头:支持 Raspberry Pi Zero,Raspberry Pi 1 B +,Raspberry Pi 2 B 和 Raspberry Pi 3 B
- POWER:用于为 ReSpeaker 2-Mics Pi HAT 供电的 Micro USB 端口,请在使用扬声器时为电路板供电,以提供足够的电流。
- I2C:Grove I2C 端口,连接到 I2C-1
- GPIO12:Grove 数字端口,连接到 GPIO12 和 GPIO13
- JST 2.0 SPEAKER OUT:用于连接扬声器,JST 2.0 连接器
- 3.5mm 音频插孔:用于连接带 3.5mm 音频插头的耳机或扬声器
入门指导
把 ReSpeaker 2-Mics Pi HAT 插入到 Raspberry Pi
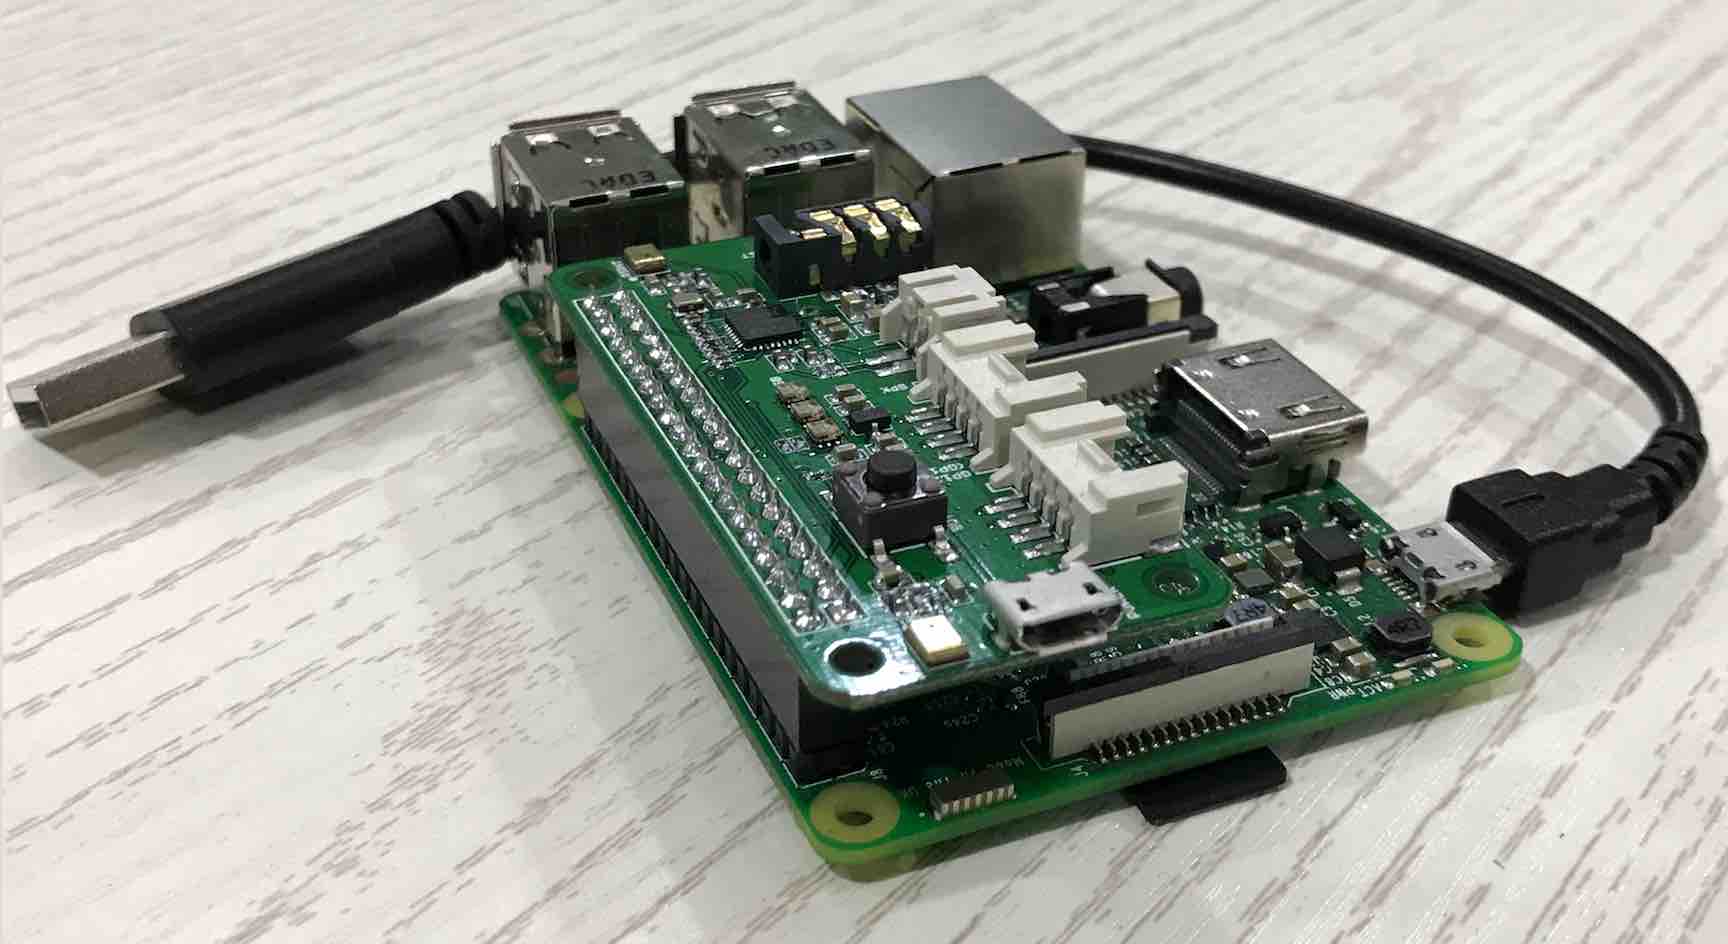
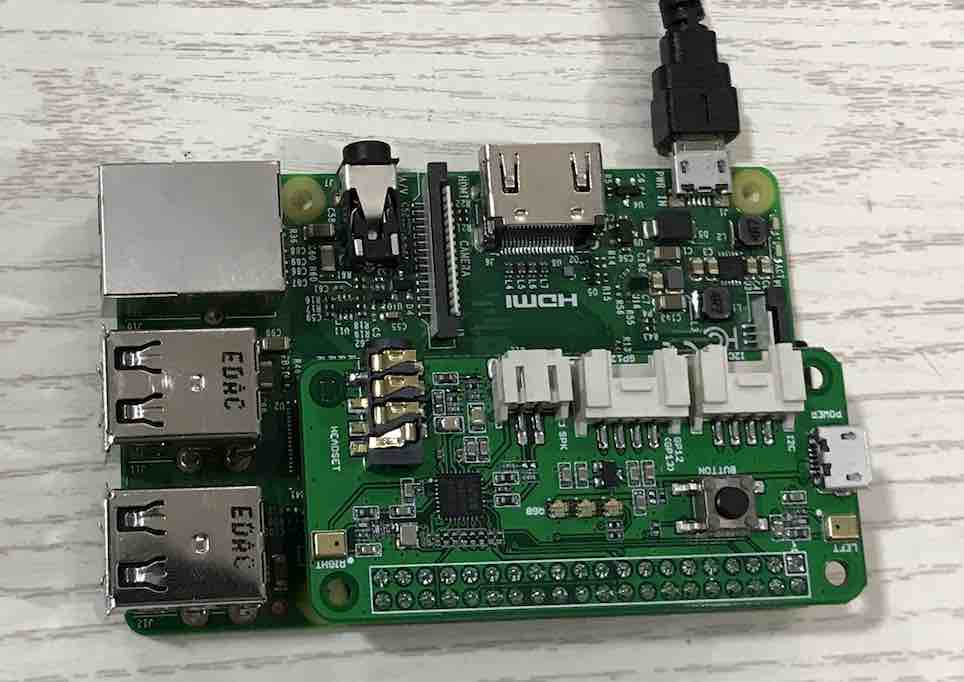
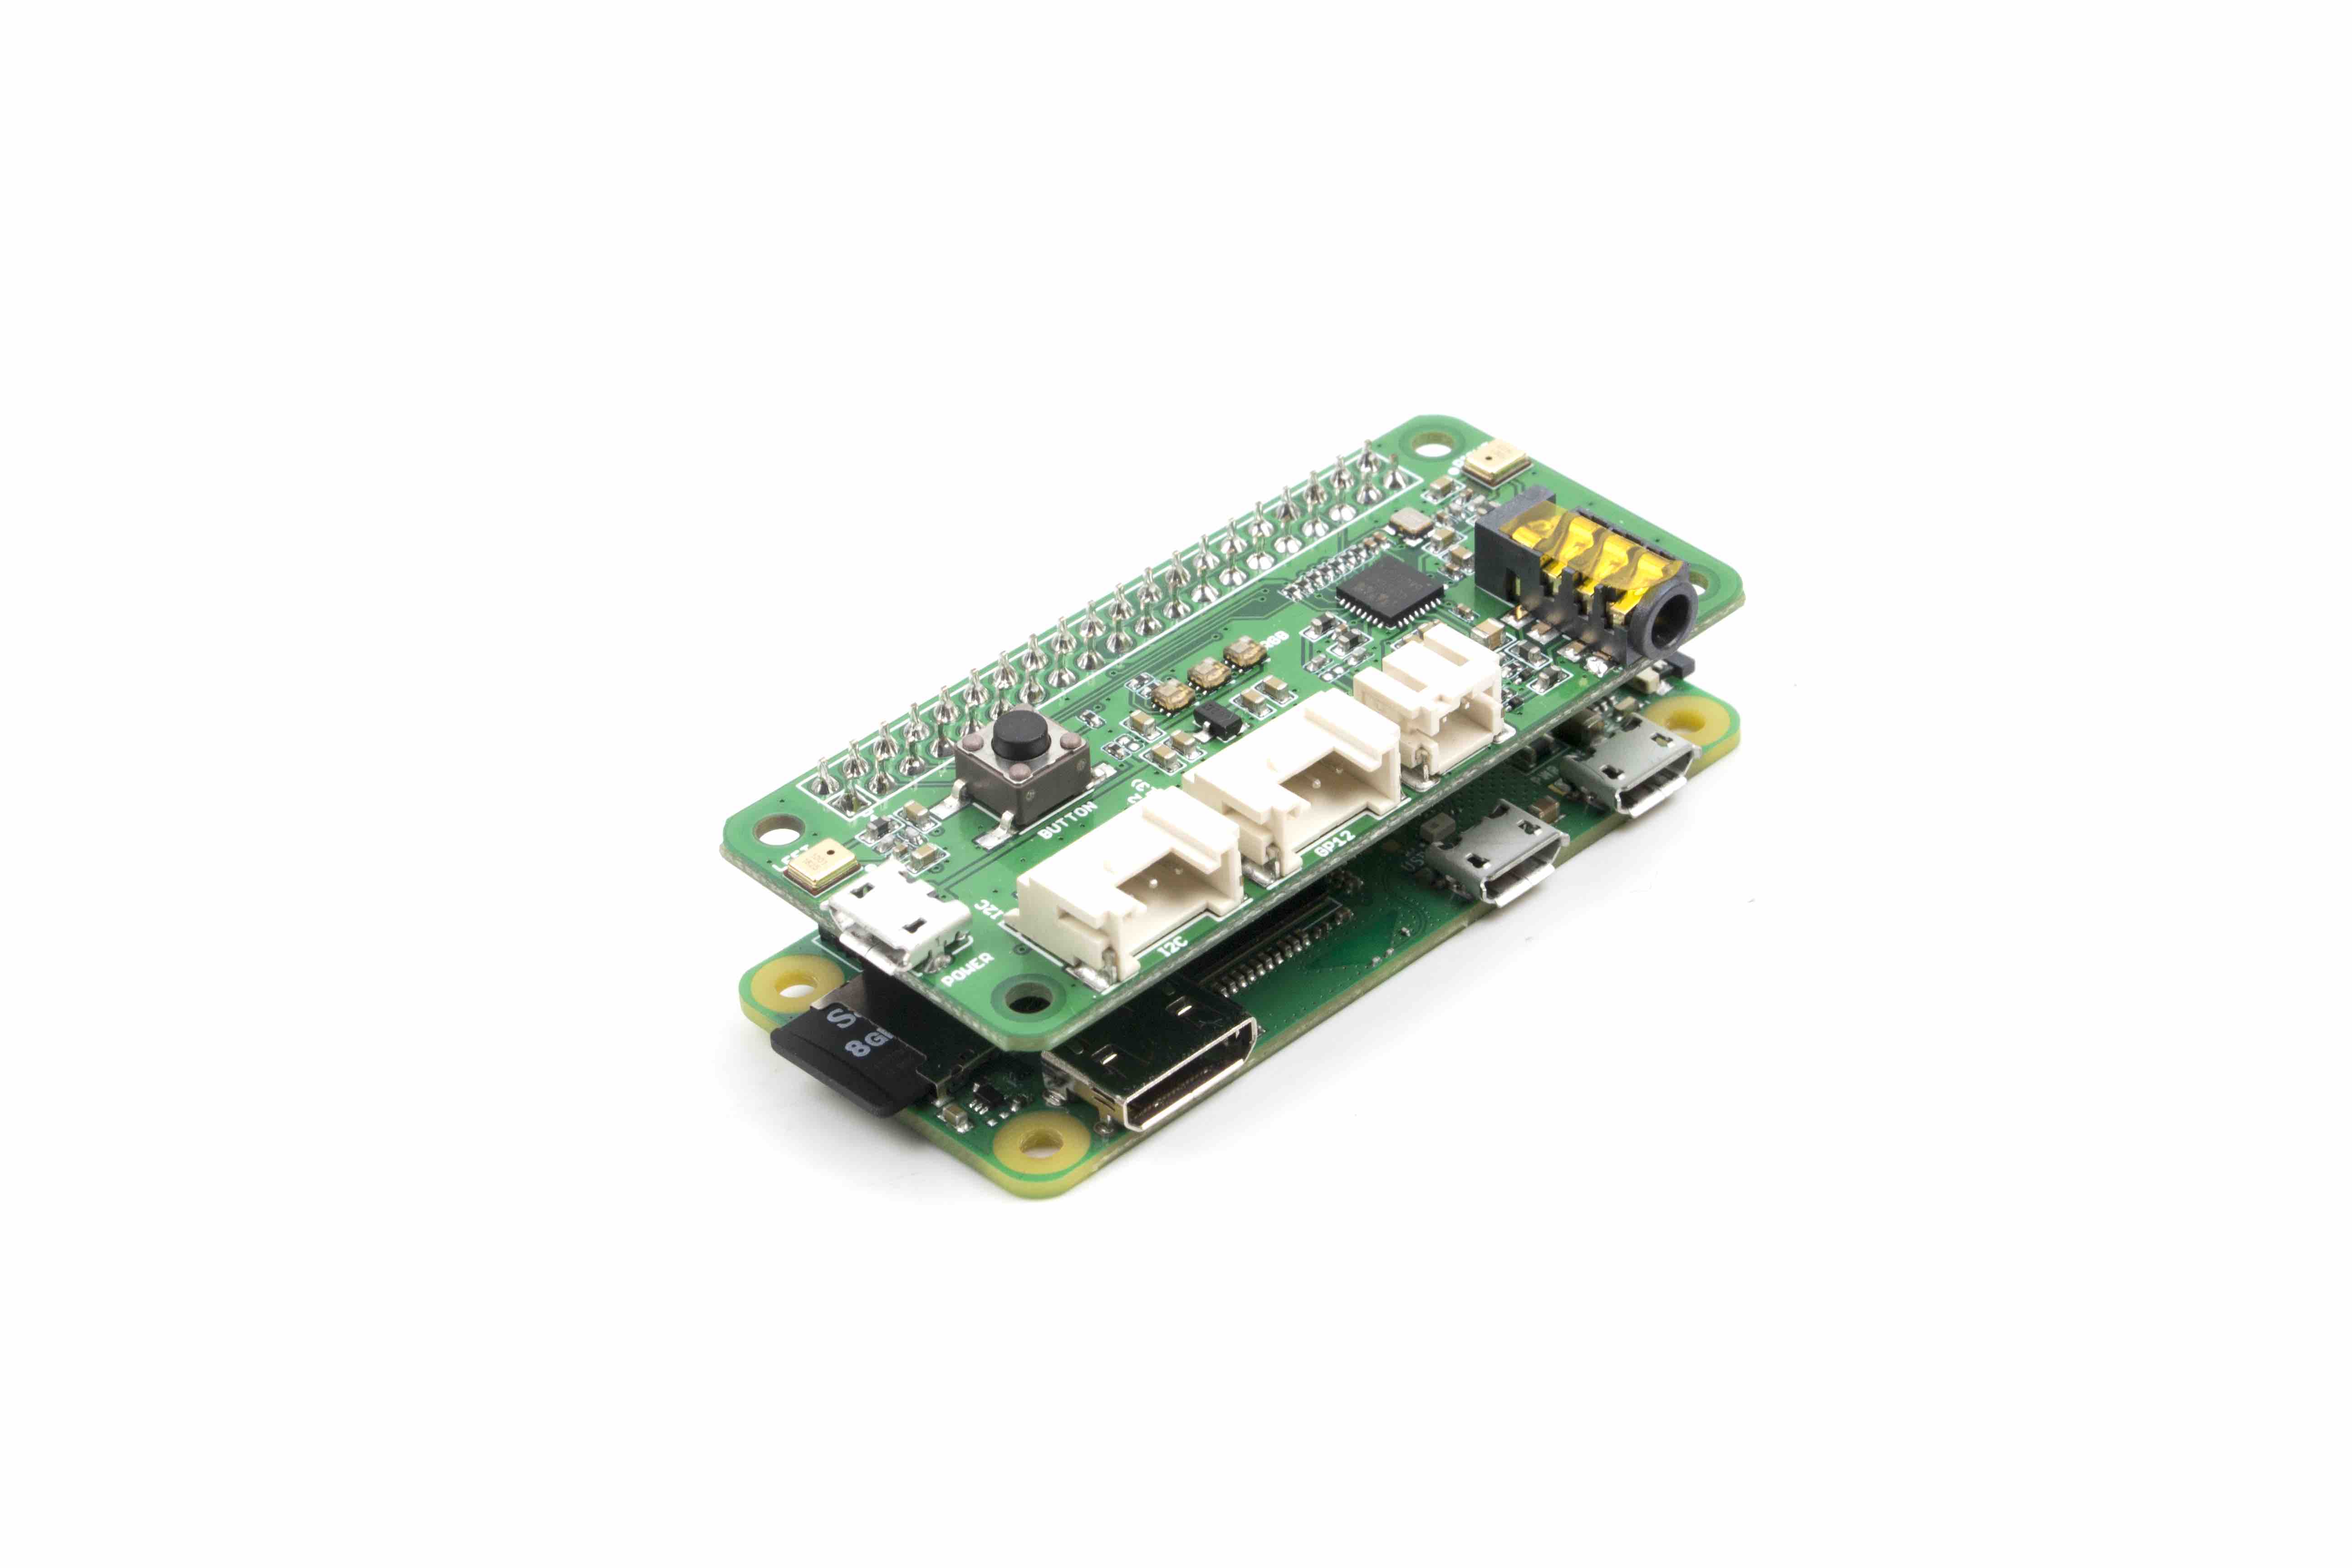
把 ReSpeaker 2-Mics Pi HAT 插入到 Raspberry Pi, 确保插入 Raspberry Pi 的时候针脚对齐。
Note
不要在上电的时候,热插拔 ReSpeaker 2-Mics Pi HAT.
安装驱动
因为当前的 Pi 内核目前不支持 wm8960 编解码器,所以我们需要手动构建。
1. 确保您正在您的 Pi 上运行最新的 Raspbian 操作系统(debian 9)。 (更新于 2017.09.15)_
2. 根据以下流程安装驱动:
sudo apt-get update
sudo apt-get upgrade
git clone https://github.com/respeaker/seeed-voicecard.git
cd seeed-voicecard
sudo ./install.sh 2mic
reboot
3. 检查声卡名称是否与源代码 seeed-voicecard 相匹配.
pi@raspberrypi:/seeed-voicecard $ aplay -l
List of PLAYBACK Hardware Devices
card 0: ALSA [bcm2835 ALSA], device 0: bcm2835 ALSA [bcm2835 ALSA]
Subdevices: 8/8
Subdevice #0: subdevice #0
Subdevice #1: subdevice #1
Subdevice #2: subdevice #2
Subdevice #3: subdevice #3
Subdevice #4: subdevice #4
Subdevice #5: subdevice #5
Subdevice #6: subdevice #6
Subdevice #7: subdevice #7
card 0: ALSA [bcm2835 ALSA], device 1: bcm2835 ALSA [bcm2835 IEC958/HDMI]
Subdevices: 1/1
Subdevice #0: subdevice #0
card 1: seeed2micvoicec [seeed-2mic-voicecard], device 0: bcm2835-i2s-wm8960-hifi wm8960-hifi-0 []
Subdevices: 1/1
Subdevice #0: subdevice #0
pi@raspberrypi:/seeed-voicecard $ arecord -l
List of CAPTURE Hardware Devices
card 1: seeed2micvoicec [seeed-2mic-voicecard], device 0: bcm2835-i2s-wm8960-hifi wm8960-hifi-0 []
Subdevices: 1/1
Subdevice #0: subdevice #0
pi@raspberrypi:~/seeed-voicecard $
4. 可以用arecord录制,然后用aplay播放:(不要忘记插耳机或者喇叭):
arecord -f cd -Dhw:1 | aplay -Dhw:1
用 alsamixer 配置声音设置和调整音量
alsamixer 是用于配置声音设置和调整音量,高级 Linux 声音体系结构(ALSA)的图形混音器程序。
pi@raspberrypi:~ $ alsamixer

Note
首先请用 F6 选择 seeed-2mic 的声卡设备。
左和右箭头键用于选择通道或设备,“向上和向下箭头”控制当前所选设备的音量。 退出程序使用 ALT + Q 或按 Esc 键。 More information
让我们开始来玩 Google Assistant
Warning
因为我们在中国,无法直接使用 Google 的服务。必须搭建可以访问 google 的路由器,然后连接到路由。
在开始使用Google Assistant之前,首先您应该将 Google Assistant Library 整合到您的 raspberry pi 系统中。 以下是Google 官方指导的链接。
以下指南还将向您介绍如何开始使用 Google 助手。
1. 配置开发人员项目,并获取 JSON 文件
请根据指南 第一步到第四步在 Google Cloud Platform 上配置项目,并创建一个 OAuth Client ID JSON 文件。 不要忘记将 JSON 文件复制到您的 Raspberry Pi。
2. 使用 Python 虚拟环境,隔离 SDK 与系统 Python 包关系。
sudo apt-get update
sudo apt-get install python3-dev python3-venv # Use python3.4-venv if the package cannot be found.
python3 -m venv env
env/bin/python -m pip install –upgrade pip setuptools
source env/bin/activate
3. 安装 google-assistant-library
Google Assistant SDK 软件包,包含在设备上运行 Google Assistant 所需的所有代码,包括库和示例代码。 使用 pip 在虚拟环境中安装最新版本的 Python 包:
(env) $ python -m pip install –upgrade google-assistant-library
4. 授权 Google Assistant SDK
授权 Google Assistant SDK,使 Google Assistant 对给定的 Google 帐户进行查询。 把步骤 1 中的 JSON 文件复制到树莓派 /home/pi 下。
pi@raspberrypi:~ $ google-oauthlib-tool –client-secrets /home/pi/client_secretclient-id.json –scope https://www.googleapis.com/auth/assistant-sdk-prototype –save –headless
/home/pi/clientsecret_client-id.json 是你的 JSON 文件的路径,确保 Json 文件的名字匹配。 运行命令后,应该显示如下所示。 复制 URL 并将其粘贴到浏览器中(这可以在您的树莓派或任何其他电脑上完成)。 同意后,您的浏览器将显示代码,例如“4 / XXXX”。 复制并将此代码粘贴到终端中。
Please go to this URL: https://…
Enter the authorization code:
这个时候应该显示: OAuth credentials initialized. 如果显示: InvalidGrantError then an invalid code was entered. 请重试, 确保拷贝整个 code.
5. 安装 pulseaudio 并且让他在后台运行
pi@raspberrypi:~ $ sudo apt install pulseaudio
pi@raspberrypi:~ $ pulseaudio &
[1] 1244
pi@raspberrypi:~ $ W: [pulseaudio] server-lookup.c: Unable to contact D-Bus: org.freedesktop.DBus.Error.NotSupported: Unable to autolaunch a dbus-daemon without a $DISPLAY for X11
W: [pulseaudio] main.c: Unable to contact D-Bus: org.freedesktop.DBus.Error.NotSupported: Unable to autolaunch a dbus-daemon without a $DISPLAY for X11
E: [pulseaudio] bluez4-util.c: org.bluez.Manager.GetProperties() failed: org.freedesktop.DBus.Error.UnknownMethod: Method “GetProperties” with signature "" on interface “org.bluez.Manager” doesn’t exist
Note
请忽略 pulseaudio 错误信息。
6. 开始使用 Google Assistant 示例
pi@raspberrypi:~ $ alsamixer // To adjust the volume
pi@raspberrypi:~ $ source env/bin/activate
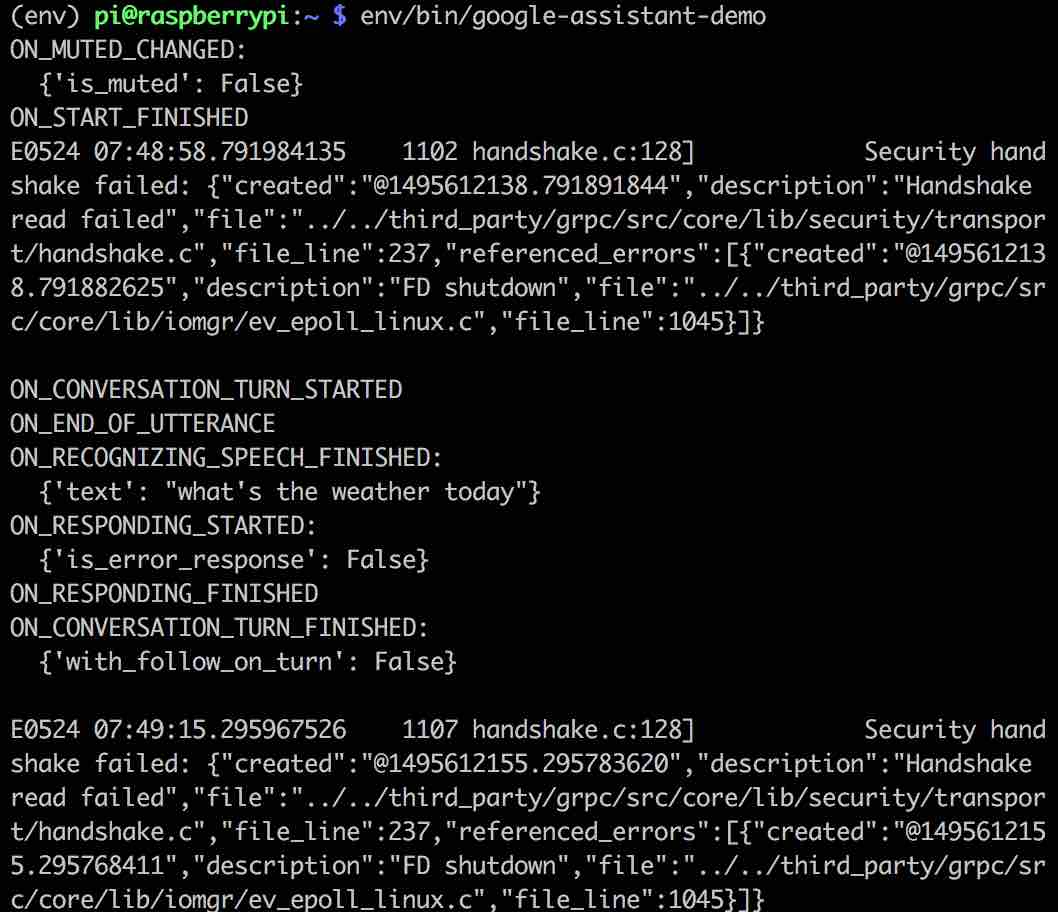
(env) pi@raspberrypi:~ $ env/bin/google-assistant-demo
7. 唤醒 Google Assistant
先说 Ok Google 或者 Hey Google, 然后说您的询问. 语音助手就会响应您的问题。如果语音助手没有响应, 请按照 疑难解答说明.
8. 常见问题解决方法
如果您遇到问题,请参考 常见疑难解答说明 。
如何使用板载 APA102 LED
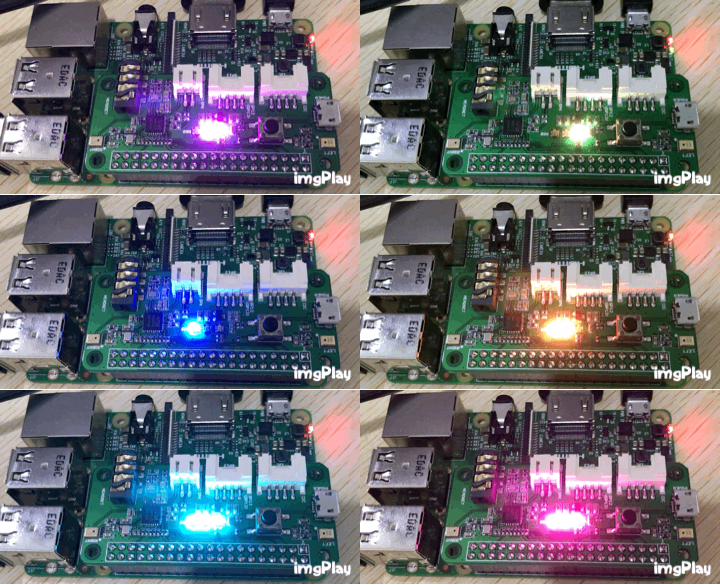
每个板载 APA102 LED 都有一个额外的驱动芯片,驱动芯片设置 LED 的颜色,然后保持该颜色,直到接收到新的命令。
1. 打开 SPI:
- 输入:
sudo raspi-config; - 选择 “Interfacing Options”;
- 选择 “SPI”;
- 选择 “Yes”
- 选择 “OK”
- 选择 “Finish”
2. 控制 APA102 LED 的示例
cd ~/
git clone https://github.com/respeaker/mic_hat.git
sudo pip install spidev
cd mic_hat
python pixels.py
如何使用用户自定义按钮
板子上面有个用户自定义按钮,连接到 GPIO17. 我们可以调用 python 和 RPi.GPIO 来读取状态。
sudo pip install rpi.gpio // install RPi.GPIO library
nano button.py // copy the following code in button.py
import RPi.GPIO as GPIO
import time
BUTTON = 17
GPIO.setmode(GPIO.BCM)
GPIO.setup(BUTTON, GPIO.IN)
while True:
state = GPIO.input(BUTTON)
if state:
print(“off”)
else:
print(“on”)
time.sleep(1)
Save the code as button.py, then run it. It should display “on” when you press the button:
pi@raspberrypi:~ $ python button.py
off
off
on
on
off
用按钮来触发 Google Assisant
您可以用按键来代替 "ok google" 来激活 Google Assisant.
- 更新
pushtotalk.py
cd /usr/local/lib/python2.7/dist-packages/googlesamples/assistant/grpc
sudo nano pushtotalk.py
请到文件第 301 行, 然后根据下面的 code 来更新。
with SampleAssistant(conversation_stream,
                     grpc_channel, grpc_deadline) as assistant:
    # If file arguments are supplied:
    # exit after the first turn of the conversation.
    if input_audio_file or output_audio_file:
        assistant.converse()
        return

    # If no file arguments supplied:
    # keep recording voice requests using the microphone
    # and playing back assistant response using the speaker.
    # When the once flag is set, don't wait for a trigger. Otherwise, wait.
    wait_for_user_trigger = not once
    import RPi.GPIO as GPIO
    GPIO.setmode(GPIO.BCM)
    GPIO.setup(17,GPIO.IN)
    while True:
        if wait_for_user_trigger:
            state = GPIO.input(17)
            logging.info('Press the button to send a new request...')
            if state:
                continue
            else:
                pass
           # click.pause(info='Press Enter to send a new request...')
        continue_conversation = assistant.converse()
        # wait for user trigger if there is no follow-up turn in
        # the conversation.
        wait_for_user_trigger = not continue_conversation

        # If we only want one conversation, break.
        if once and (not continue_conversation):
            break
if name == ‘main’:
main()
- 运行下面程序来进行测试:
$ googlesamples-assistant-pushtotalk
- 程序运行的结果如下图所示:

树莓派系统
由于 Raspbian 操作系统更新为 Debian 9,我们将不再提供我们的 Raspbian 系统。 点击这里获得最新的 Raspbian 操作系统。
FAQ(疑问解答)
1.
Q: 严格按照本 wiki 操作,驱动还是安装失败,怎么办?
A: 如果按照上述方法安装驱动均失败,请点击下面固件安装
下载密码:cn78
资源下载
- [Eagle] Respeaker2MicsPiHAT_SCH
- [Eagle] Respeaker2MicsPiHAT_PCB
- [PDF] Respeaker2MicsPiHAT_SCH
- [PDF] Respeaker2MicsPiHAT_PCB


